 05/11/05: Jacking up the plane.
Prior to this I have been using a floor jack and a 2x4 piece to lift the
plane under the spar when needed. That has been precarious since the
2x4 sometimes leans over and the whole thing can roll away. Recently I
found a 1100 lbs transmission jack at Harbor Freight for about $120
and converted it to a plane jack for my SQ2000. I omitted the casters
and chopped off about 2" off the top plunger and welded a 4x4x0.25 plate on
top (put a 1-1/8 hole in late middle first). The jack extends from 33" to
near 60".
05/11/05: Jacking up the plane.
Prior to this I have been using a floor jack and a 2x4 piece to lift the
plane under the spar when needed. That has been precarious since the
2x4 sometimes leans over and the whole thing can roll away. Recently I
found a 1100 lbs transmission jack at Harbor Freight for about $120
and converted it to a plane jack for my SQ2000. I omitted the casters
and chopped off about 2" off the top plunger and welded a 4x4x0.25 plate on
top (put a 1-1/8 hole in late middle first). The jack extends from 33" to
near 60".
Peel Ply.
Use peel ply whenever you can. It does two things: 1) removes the top skin layer of epoxy and makes next glassing stick better 2) peel ply absorbs and removes some of the excessive epoxy - I am not the best in keeping the epoxy to fibreglass ratio low.

Ivo In-flight adjustable prop monitoring.
During flight testing I found it hard to know when the Ivo prop is at takeoff/landing low pitch. Ivo provides a 10A circuit breaker so that if you go to the extreme the 10A circuit breaker will pop and you will know that it reached the end. But I have never seen the circuit breaker pop yet and I don't want to waste so much battery current. Or you could simply guess 15 seconds or whatever. You could also spend another $300 for the IVO electronic constant speed control but it only takes up more room and is an awkward box that does not fit into the panel.I found this neat little 10A panel meter (http://www.goldmine-elec.com/ $1.99 each, part number G4516) which will tell me when I reached either pitch extreme since the current increases at those points.
After installation I was told that IVO prop uses about 20A at max current - the 10A breaker pops at about 24A. So I wrapped a 14gauge wire around the meter terminals to act as additional shunt. That worked out well.
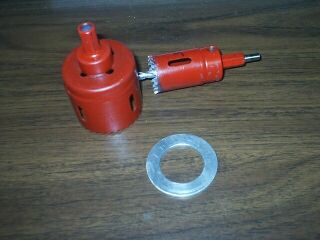
Need a Big Aluminum Washer?
Get aluminum sheet metal thickness you need and use two hole saws. Use the larger hole saw first.
I had three large steel washers on the main RG trunion pin end
and replaced them with aluminum washers. Saved almost 6 ounces.
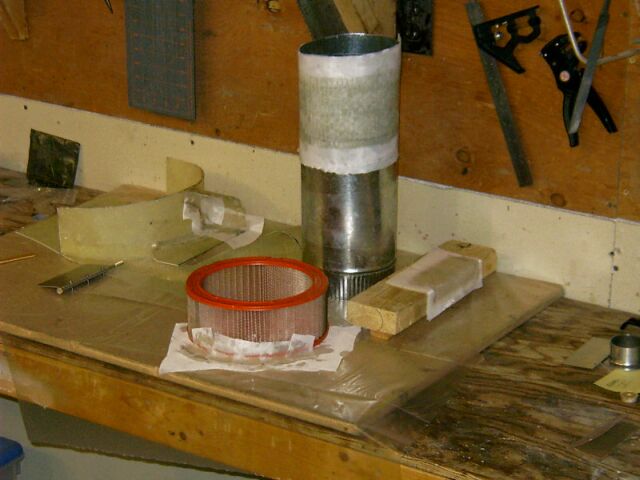
Glassing odd ball shapes.
Here are some differenct ways I used to get shapes I wanted. This case shows different glass pieces I needed for the carb air intake system.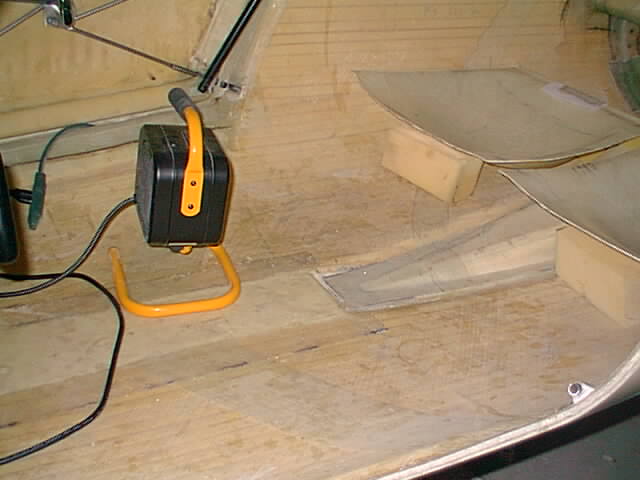
Speeding up epoxy curing rate inside fuselage.
Fast epoxies are usually not recommended for their lower strength values except in non critical applications. The good epoxy normally takes overnight to cure. One way to speed up cure rates is to increase ambient temperature. I control my garage temperature with the wall thermostat but it may be expensive for individual applications. While working inside fuselage you can simply place a small quartz electric heater to raise the temperature.Small metal lathe.
I recommend getting a small metal lathe. Its really handy for making or modifying lots of small parts. You can "rent" it from eBay. After you are finished with it you can probably sell it and get back about 80% of what you paid.Sanding with grinder.
An aluminum oxide flap disk (available at Wall-Mart too) attached to a small 4 inch grinder makes an excellent FAST sander. You can have fairly good precision control by varying the pressure - but watch it with a brand new disc.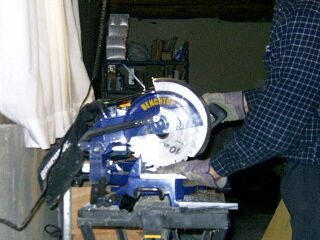
Cutting Aluminum
is easy with a miter saw with carbide teeth - almost like hardwood but do it a little slower and wear gloves, gogles and ear protection.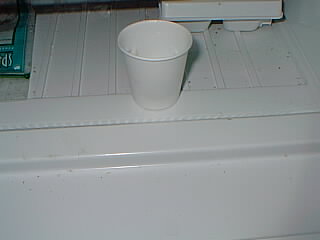
Saving leftover epoxy mix
I must have lost "tons" of leftover epoxy, especially on small jobs. I have a problem of not being able to estimate closely how much to mix. Now I take the leftovers and put it in small pots in the freezer. It keeps good for up to two days. Just pop it in the microwave (not too long) and the stuff thins out. The stuff does thicken even in the freezer after a while and after several re-uses. I would not use it for high strength applications. It is excellent for small dabing jobs, floxing, microballoons, etc. Now I am wasting much less epoxy.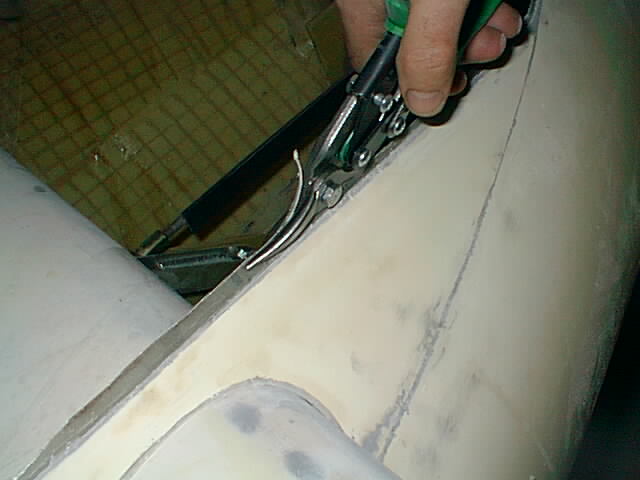
Trimming curred glass
In situations like after curing backstop for doors or boot hatch you could trim it with knife and/or grind it. The knife really misses direction sometimes and that grinding - cough... cough... itch... scratch.... This is a better more controllable way.Filling NG side plates with fiberglassed crush plugs - an easier way.
Instructions are to remove the foam discs from the plates and then painstakingly cut a pile of tiny little fabric disks and then glass them into the holes AND then lay the top glass layer in same session.An alternative is simply to make a 3 x 12 strip of about 15 layers and glass them together (and peel ply) and after curing you cut out the correct size of disks with a jig saw and sand to fit in shape to fit the NG side plate holes. If the disks are too thick, it is easy to sand them down (with sander above). Make sure you put some floxed mix into the holes and then squeeze it out as you are pressing the disks into place to remove any air bubbles. See the disks cut ready for insertion
Cutting templates for hard foam - don't do it.
To form the high density foam (HDF) into desired shapes you are supposed to: 1. Cut a piece of hardboard ("masonite"), 2. use spray glue to attach the blueprint to the hardboard. 3. Jigsaw cut the hardboard and sand to make a template. 4. use the template to mark and cut and eventually sand the high density foam to shape.As I was working with the HDF, I found that it is quite brittle and you can scour it with a utility knife and snap it just like glass along a line or curve. An even better way is to scour it initially with a utility knife and then get the depth with a pizza fabric cutter (from Wall-Mart) to finish the cut and the thing just snaps apart. You can simply take the blueprint and tape it on top of the HDF and follow the blueprint lines to shape the HDF to about 1 mm accuracy - almost no sanding required. See the cutting of the center console HDF plates
How to find the fuselage vertical center plane using a laser level.
While the manufacturer provides leveling lines for the fuselage it doesn't provide accurate means of centering the bulkhead along the length of the fuselage. The fuselage halves are not always perfectly symmetric. The center vertical plane between the plates should be along the longitudinal center line of the fuselage and not half way between the sides due to lack of perfect symmetry of the fuselage halves on the inside. And it is difficult to establish the center that way due to the curvature of the sides as you approach the front.After you got the fuselage leveled, place the laser level on a (good) camera tripod at the rear of the fuselage and align the laser beam so that it is half way between the fuselage sides (at the rear and at the level of the manufacturer provided leveling lines there) and also lines up with the front cone center hole. Then you can simply move the laser up and down to define a vertical plane which runs along center of the fuselage length. Make sure - of course - that the laser level is level sideways before you do that. You should center the NG side plates with the FS-16 front BH first - draw little vertical center lines on the blocks separating the side plates. Then you fix the position of that assembly with some "glue" (I used dabs of 10 minute "floxed" epoxy). The last thing to position is the rear FS-37 bulkhead - I found a lot of sanding and positioning was required. After you secure in the FS-37, draw a vertical central reference line on back of it ("aft") using the laser beam which you centered.
How to line up spar with front nose using a laser level.
Putting a broom stick in front cone does not strike me as accurate since the stick is hard to line up in the first place.Setup your laser level again in the rear in a central vertical plane as above - this time you can use the vertical central line you marked on rear of FS-37 bulkhead and the center rear of fuselage as before. Then simply tilt your laser level up (in the central vertical plane) above the the FS-37 over the nose of the fuselage AND onto the workshop wall. Then just mark the point on the wall (in my case the garage door that weighs a "ton"). That should be a more accurate reference point than the end of broom stick.
Do not cutout and install door windows until after door reinforcement (hindsight)
When reinforcing windows, I found it difficult to keep the epoxy and glass off the window area - even though I protected the windows with SprayLat. The point is that even with SprayLat a little epoxy/glass over it is a pain to cut again and remove the hardened stuff.To be frank, there is no reason why windows could not be installed as one of the last things when you are much more experienced with glassing - except for emotional satisfaction of "seeing progress".