

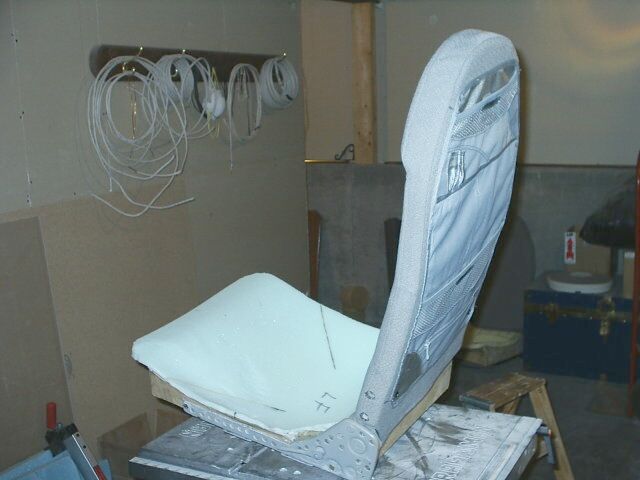
 Wow... 10 hours just to make two front seat backs. Guess I am not an efficient
upholsterer - or a steep learning curve trying to figure things out.
Wow... 10 hours just to make two front seat backs. Guess I am not an efficient
upholsterer - or a steep learning curve trying to figure things out.I got the polyester fabric from AirtexInteriors.com. With polyester you can use a soldering iron to singe bare edges to seal them (like rope) and you can carve holes same way for seat bolts (as per two holes on left side).
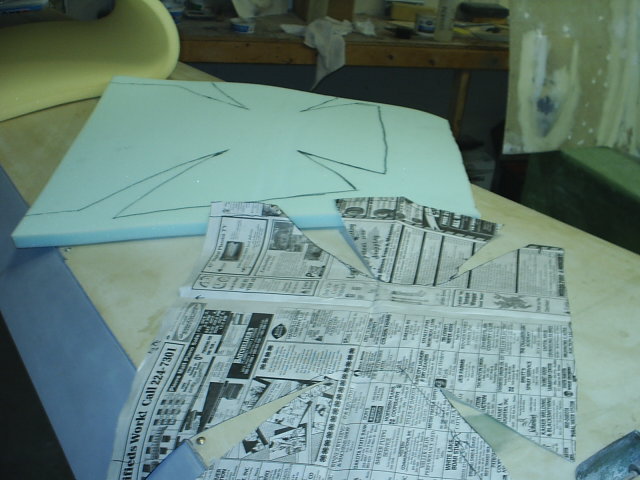
 Seats are tricky. To get the caved in effect, I marked "vertically" parallel
lines on the seat foam (5 sections total), used heavy plastic (6 mil) to mark/cut
the strip patterns. The strips are then joined together by being glued
on the back together with a thin strip (a mid reference line is shown for lineup)
and then the strips are sown on each side of the join line. By the time you get
all the stuff together - several days easily. I used up all the small spool (button
strength) thread from local Wall Mart and ran out of thread and had to order it
from some place over Internet. Now have to wait for the thread. No wonder homebuilt
planes take forever.
Seats are tricky. To get the caved in effect, I marked "vertically" parallel
lines on the seat foam (5 sections total), used heavy plastic (6 mil) to mark/cut
the strip patterns. The strips are then joined together by being glued
on the back together with a thin strip (a mid reference line is shown for lineup)
and then the strips are sown on each side of the join line. By the time you get
all the stuff together - several days easily. I used up all the small spool (button
strength) thread from local Wall Mart and ran out of thread and had to order it
from some place over Internet. Now have to wait for the thread. No wonder homebuilt
planes take forever.AfterBuild 06/15/04 note: When I built the seats without the cushion they were approximately suitable for my long back height. But then I added a firm 1" cushion to the seats. This resulted in uncomfortable lack of headroom. So now I had to tear out the seat cushion (unglue the seat cover sufficiently) and replaced it with a soft 1/2" cushion which is not as cushy but restores the headroom to a comfortable level.
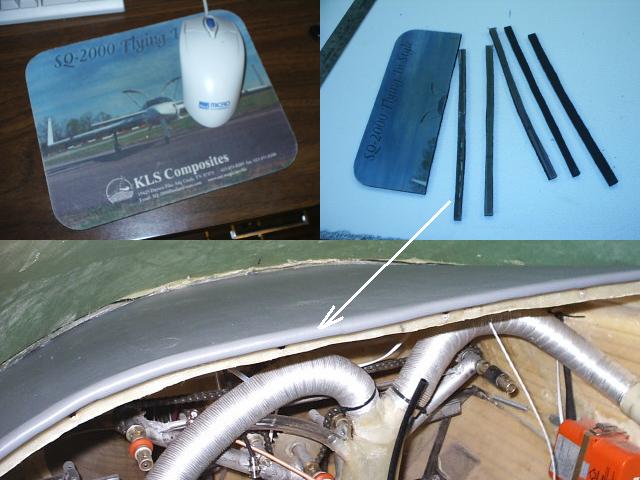 One of the things in EAA builders articles is a suggestion to place some sort
of cushioning on leading edge of glare shield. Half round of a rubber hose
was shown. But that would look ugly in this case. It turns out that KLS gave
me a nice thick mouse pad when I bought the kit. When cut into 5/16 strips it
makes ideal texture cushion strips which I glued on the front edge of the
glare shield before closing the vinyl over it.
One of the things in EAA builders articles is a suggestion to place some sort
of cushioning on leading edge of glare shield. Half round of a rubber hose
was shown. But that would look ugly in this case. It turns out that KLS gave
me a nice thick mouse pad when I bought the kit. When cut into 5/16 strips it
makes ideal texture cushion strips which I glued on the front edge of the
glare shield before closing the vinyl over it.The seats, carpet and most of sides and top of inside is finished now. Essentially got to finish installing the new Narco VOR/GS 122D that couples with the IFR GPS. And then exterior priming and painting.... Wana get this thing flying before I die of old age. Just saw a guy on rec.aviation.homebuilt news group that took 12 years (2000hrs) to complete his RV-4. Not sure if I got 12 years. I think, like flying, its better to do the thing accelerated in a few years or less so you remember what you are doing.
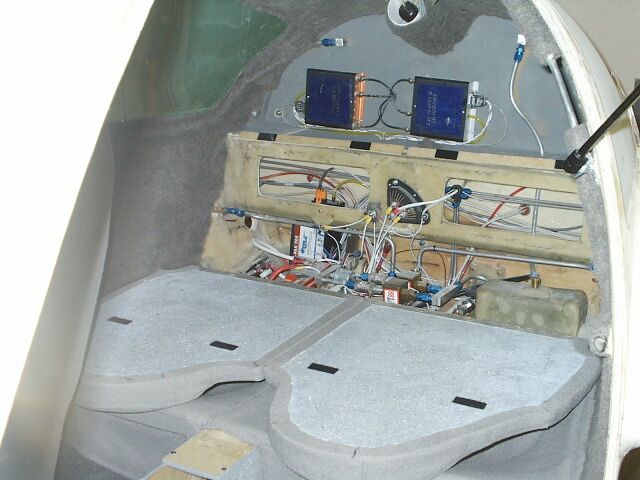
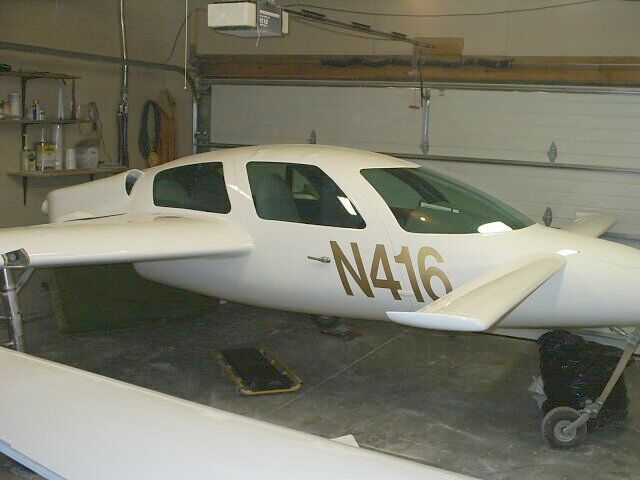
The rear seat backs when folded down reveal the myriad of fuel and electrical system.
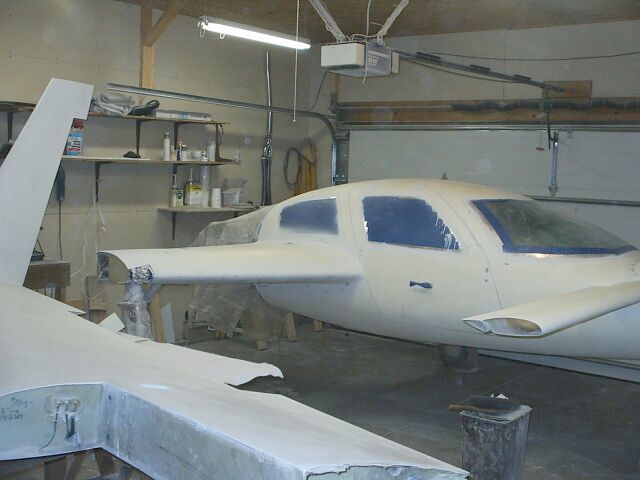
And now I have mainly exterior patching/sanding to do before taking it to a
paint shop for paint spraying. (First photo updated 08/16/2007.)

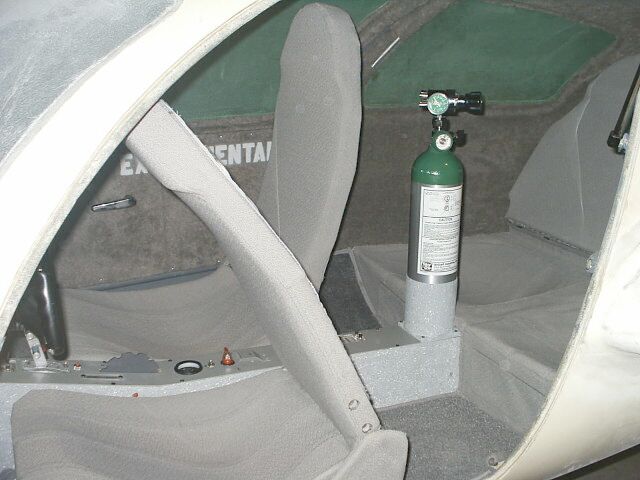 The wonders of fiberglassing... A cup shaped holder perfectly holds a 15 cu ft
SkyOx oxygen bottle - or could be used for misc stuff when the bottle is out.
The wonders of fiberglassing... A cup shaped holder perfectly holds a 15 cu ft
SkyOx oxygen bottle - or could be used for misc stuff when the bottle is out.
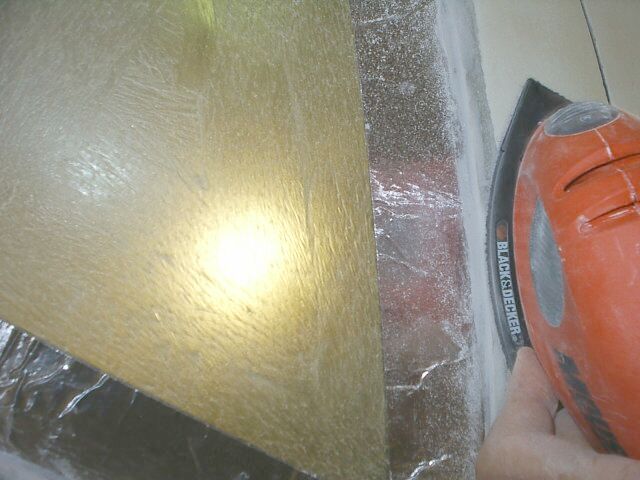
 Filling sanding has got to be on top of the messy jobs list - sanding dust
all over the garage. Wife complains about it tracking into house.
Filling sanding has got to be on top of the messy jobs list - sanding dust
all over the garage. Wife complains about it tracking into house.
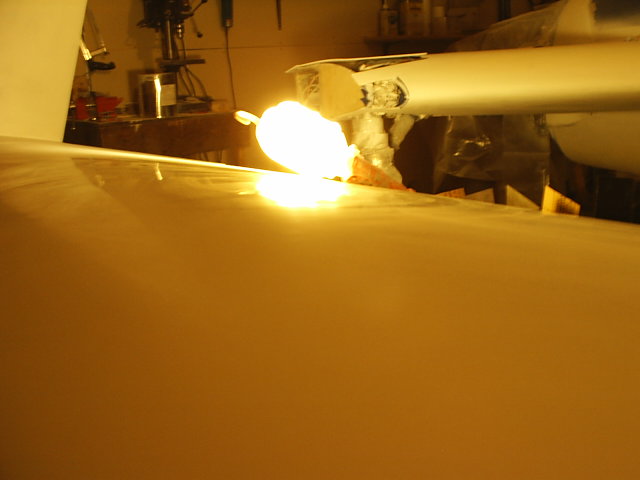
 One of the more tricky to finish is edging around windows. I covered the window edge
with aluminum foil tape (Wal-Mart $2/roll) and then pasted the epoxy - glass
bubble mixture over the beveled edge to cover initial irregularities I created
with the rotary tool (Windshield and windows). Then sanding
it level is easier with a B&D mouse sander.
A light inside helps to see where the edge of the tape is.
One of the more tricky to finish is edging around windows. I covered the window edge
with aluminum foil tape (Wal-Mart $2/roll) and then pasted the epoxy - glass
bubble mixture over the beveled edge to cover initial irregularities I created
with the rotary tool (Windshield and windows). Then sanding
it level is easier with a B&D mouse sander.
A light inside helps to see where the edge of the tape is.
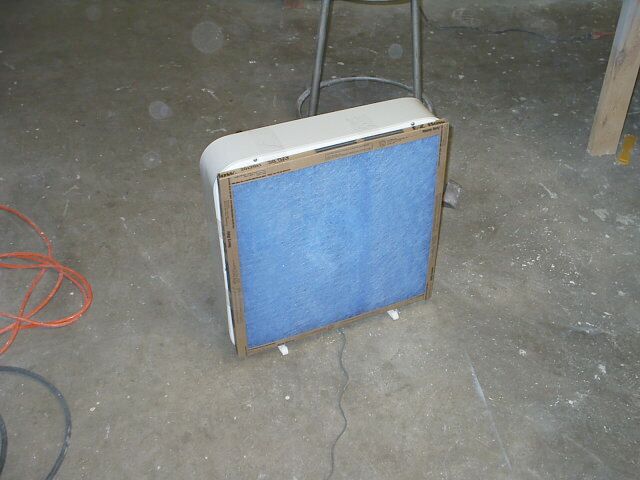 Sanding really generates a lot of dust. Here is a $12 dust collector
system while I work or clean: a 20x20 furnace filter taped on back of a 20x20 fan.
Sanding really generates a lot of dust. Here is a $12 dust collector
system while I work or clean: a 20x20 furnace filter taped on back of a 20x20 fan.
 Priming with Poly Fiber UV Smooth Prime: I used a roller for priming the stuff.
Despite what the instructions say, thin the mixture with about 10 - 15% water.
As it comes out of the can it is very hard to sand down to
a smooth finish. When mixed with water, the texture does not occur. If you have
a fairly smooth surface to begin with, you can prime it and sand it with the
thinner stuff much easier.
Priming with Poly Fiber UV Smooth Prime: I used a roller for priming the stuff.
Despite what the instructions say, thin the mixture with about 10 - 15% water.
As it comes out of the can it is very hard to sand down to
a smooth finish. When mixed with water, the texture does not occur. If you have
a fairly smooth surface to begin with, you can prime it and sand it with the
thinner stuff much easier. I finally tried spraying the stuff - with a Wagner airless I had sitting around - and it turned out better. I found that overall you need an initial primer coat and sanded down to get things even - but which will show some bare spots too. and then a final even coat which can be sanded with 400, 600 and 1200 grit successively. It seems that the primer does not have a tendency to fill in pinholes and some of those pesky tiny pinholes I filled with automotive glazing compound.
How to fill more uneven/textured surfaces: Some surfaces are rough but not epoxy microballoon filler candidates. You can fill those with a thick paste made up of UV smooth prime and microballoons. It is lighter and sands down real easy with coarse sandpaper.
 After sanding the primer with 1200 grit sandpaper, you can see reflections
on the surface. However, just before painting, the painter indicated he
wanted 400 grit on the primer. So I went over the surface with 400 grit.
Must have misunderstood his request earlier.
After sanding the primer with 1200 grit sandpaper, you can see reflections
on the surface. However, just before painting, the painter indicated he
wanted 400 grit on the primer. So I went over the surface with 400 grit.
Must have misunderstood his request earlier.
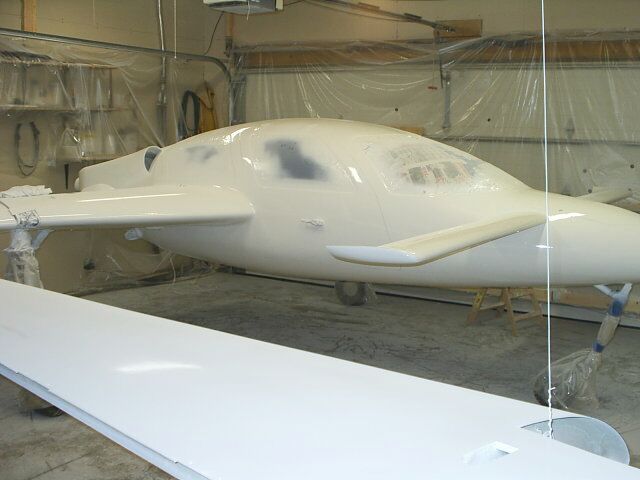
 Priming/sanding finished. Waiting for the paint shop guy to show up and see
if its ready for painting.
Priming/sanding finished. Waiting for the paint shop guy to show up and see
if its ready for painting. Glad this stage is over with. Amazing amount of dust in the garage, basement, house etc. Cleaned the garage two times to remove the dust. The best way I found was to use the air hose and blow everything down and sweep floor. First time there was about 2 lbs of dust, second time again another .5 lbs.
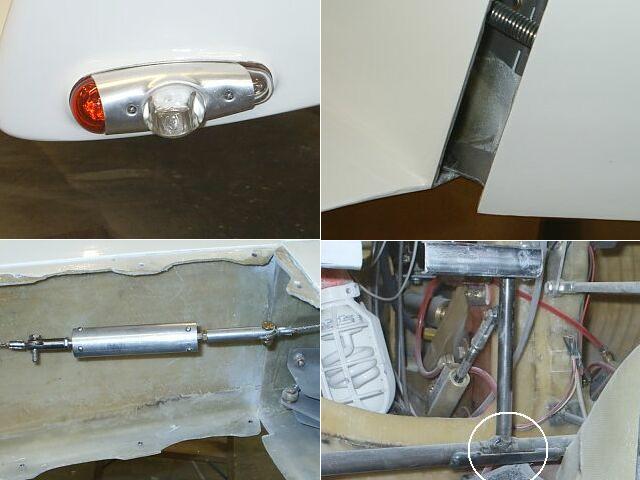 various connections and final adjustments need to be made: navigating lights,
rudder spring and cable and compander connection.
various connections and final adjustments need to be made: navigating lights,
rudder spring and cable and compander connection.
Dang.. it.. The right rudder
pedal inner weld broke while testing the rudder. Now will have to take it out
and weld the pedal to the inner shaft properly. Good thing it happened on the
ground.
Since the two original welding holes are on the bottom covered by the outer half
shafts, I ground out a couple holes on the top and welded through those. And...
the new weld appears to be strong enough.


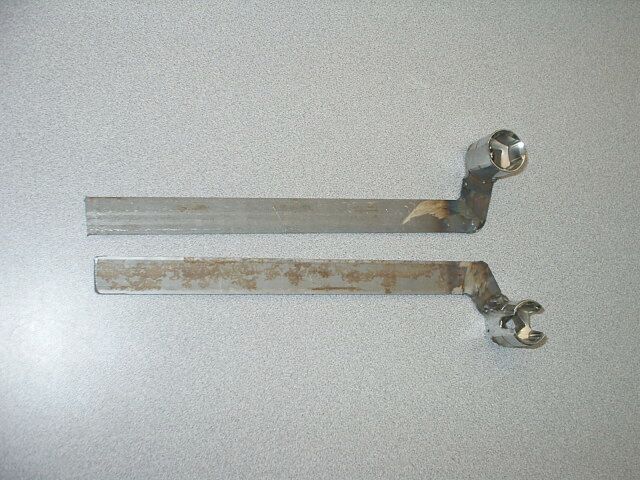 Don't know about you, but my hands are little too big to go into the outer/under
wing bolt holes to access the upper/lower bolts inside.
So far I used plain nuts and just spun them on. But with locknuts, there needs
to be some way to hold the bolts inside when turning the nuts outside.
A little welding and re-shaping with two 3/4 sockets makes things easier.
The flattening of the sockets on top and bottom was needed because the bolts
were close to the top and bottom of the spar.
Don't know about you, but my hands are little too big to go into the outer/under
wing bolt holes to access the upper/lower bolts inside.
So far I used plain nuts and just spun them on. But with locknuts, there needs
to be some way to hold the bolts inside when turning the nuts outside.
A little welding and re-shaping with two 3/4 sockets makes things easier.
The flattening of the sockets on top and bottom was needed because the bolts
were close to the top and bottom of the spar.A little warning: When tightening wing bolts make sure there are no wires/cables caught up in front of them. Happened to me once, yuk... replacing an antenna cable is not fun.
Anybody got suggestions to make nice streamline plugs for the wing bolt access holes?
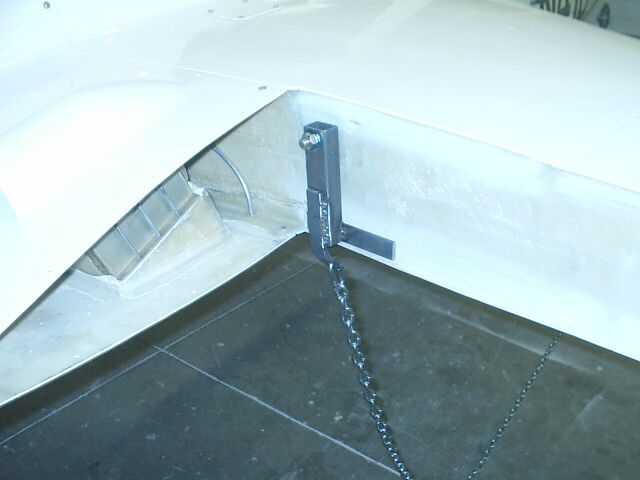
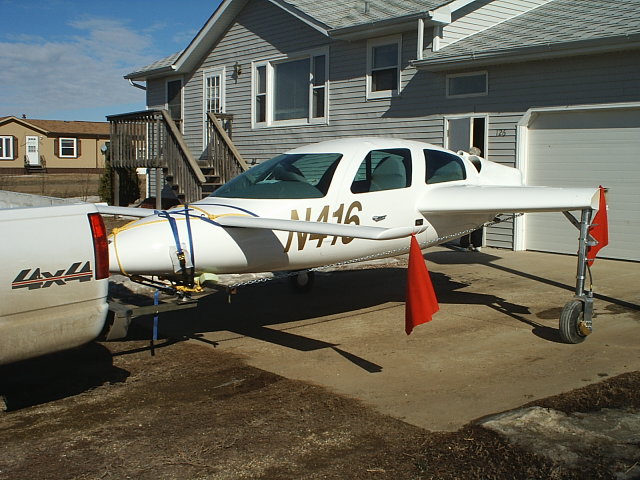
And finally its out of the garage on its way to the airport where it arrived safely. The towing jig with the chain and front harness strapping worked well. The chain was for towing forward, the rope harness for holding it back when braking and the blue straps were for holding it from slipping sideways.
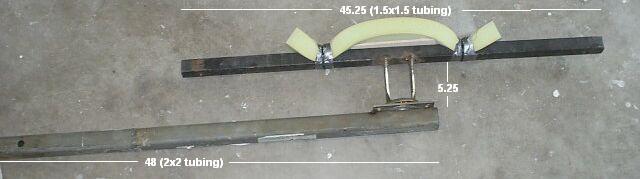
When you finish your project, KLS may loan the tow jig to you for
towing to the airport. Or you can make your own. Its fairly simple
construction. Its made of a tow receiver 48" 2x2 bar on top of which
is welded a industrial duty caster frame on top of which is welded
a 45.25" 1.5x1.5 bar for holding the nose up. The top bar has 1/2 vertical
holes for fastening with bolts, or whatever.

 And finally at the hanger with both wings on.