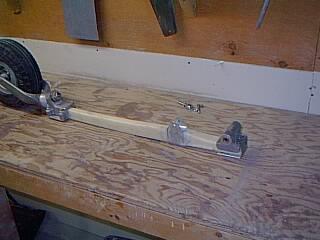
 Putting strut pieces together. The pivot and middle bracket did not fit precisely - had
considerable play which made it harder to position exactly to each other. The solution was to bond
the middle bracket first and then place the other parts with respect to it later (as shown). This
was no trivial task requiring different angle measurements since the centers of the pivots of 2
right units are not in the same plane.
Putting strut pieces together. The pivot and middle bracket did not fit precisely - had
considerable play which made it harder to position exactly to each other. The solution was to bond
the middle bracket first and then place the other parts with respect to it later (as shown). This
was no trivial task requiring different angle measurements since the centers of the pivots of 2
right units are not in the same plane.
Note: before you assemble the nose gear you might consider a roller bearing
pivot assembly instead of the KLS factory standard "Cozy MK-IV" unit.
See below.
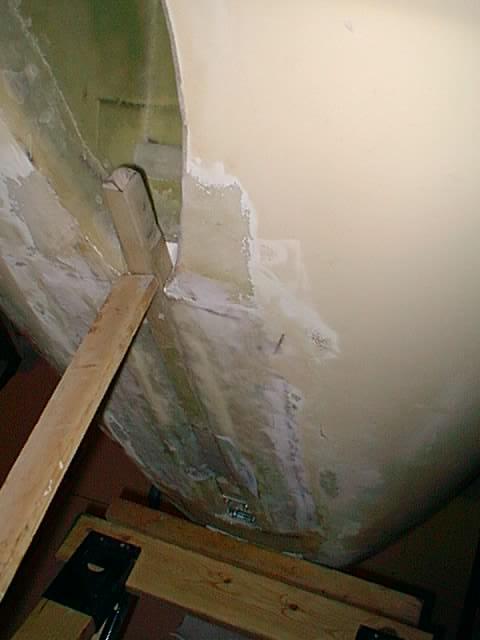
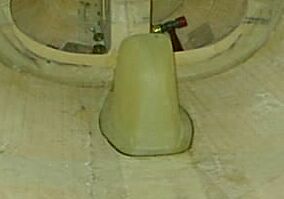 The position of nose wheel inside cover was also tricky. The factory position
was not optimal. So that cutting a full size hole could be a mistake. I cut an undersize
hole just enough to get the nosewheel up and then placed the cover over. And then moved
the cover to left/right/forward/back extremes (places where it touches the nose wheel)
and then averaged the position to get optimal clearance. With the cover in place the floor
final cut position was marked with a felt pen from underneath and then the floor was cut and
cover bonded into place only.
The position of nose wheel inside cover was also tricky. The factory position
was not optimal. So that cutting a full size hole could be a mistake. I cut an undersize
hole just enough to get the nosewheel up and then placed the cover over. And then moved
the cover to left/right/forward/back extremes (places where it touches the nose wheel)
and then averaged the position to get optimal clearance. With the cover in place the floor
final cut position was marked with a felt pen from underneath and then the floor was cut and
cover bonded into place only. 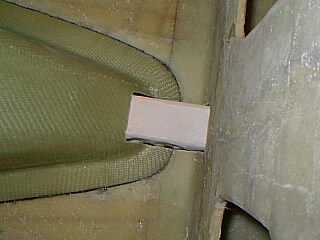
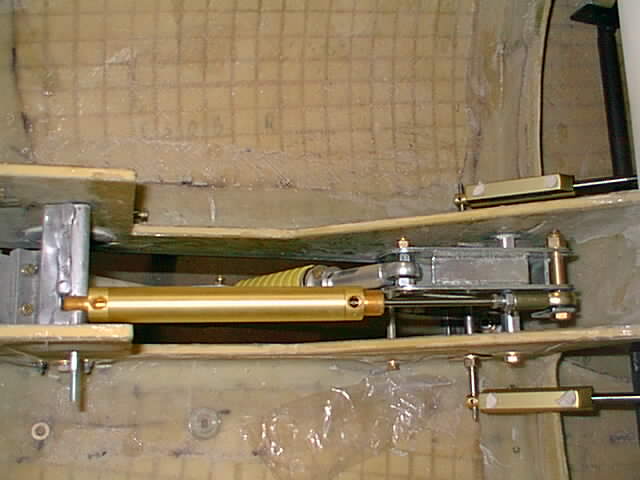
 The gap cover in place
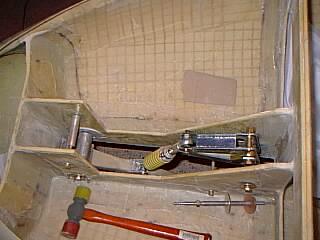
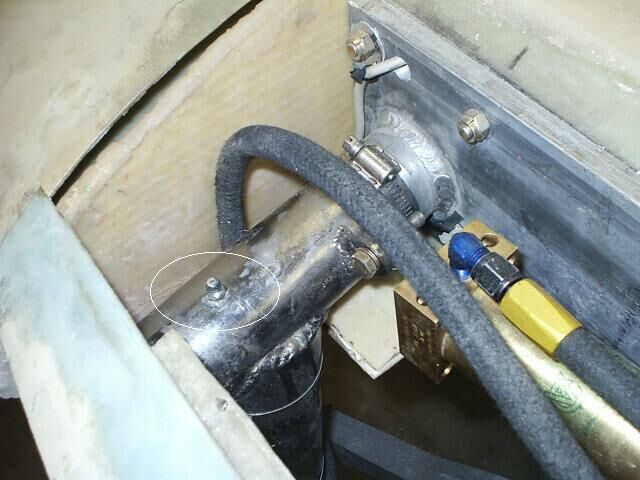
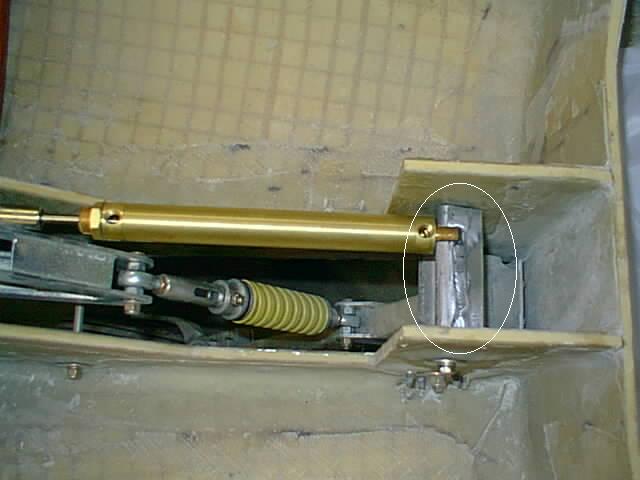
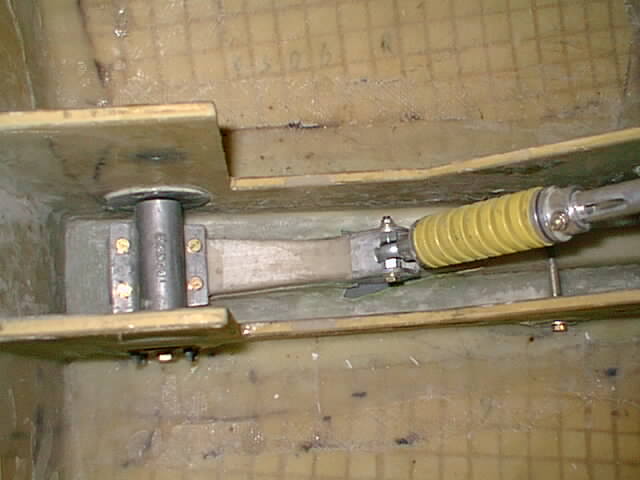
Onother problem was that the new Clippard replacement cylinder supplied by KLS was too
long interfering with operation as seen in photo. I intend to replace it soon with a
shorter one (hope it does the job).
See the NG side plates construction warning.
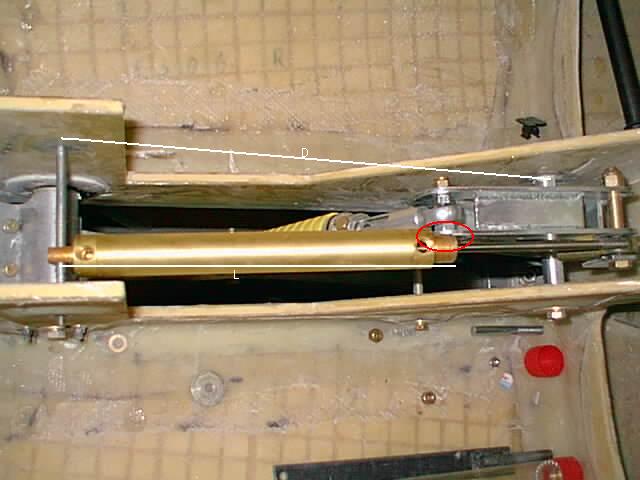
The shorter Clippard replacement cylinder arrived today (01-30-02) AND FITS with
sufficient action length as seen below. What a relief - no bulkhead mods
needed.
BUT 10/29/02 Update: There is a problem with the clippard cylinder in general.
The 0.25 inch center rod is not designed to stand thrust loads - it buckles (bends like
a bow) when extension pressure is applied. Found that when testing RG retraction.
I can adjust the clippard cylinder rod end so that it actually
stops its travel at full extent position with the nose gear fully retracted.
But what happens if you pull a few g's? It may bend or possibly distort the
rod and prevent it from retracting properly to landing position - or
even leak out the hydraulic fluid. The solution I found was a sturdier cylinder
with a 0.5 inch center rod from "Cylinders & Valves Inc., Stongsville, OH.
440-238-7343" - "HCC-1000 5" stroke, double acting with 3/8-24 shoulder thread.
The cost for this essentially custom made cylinder is $115.
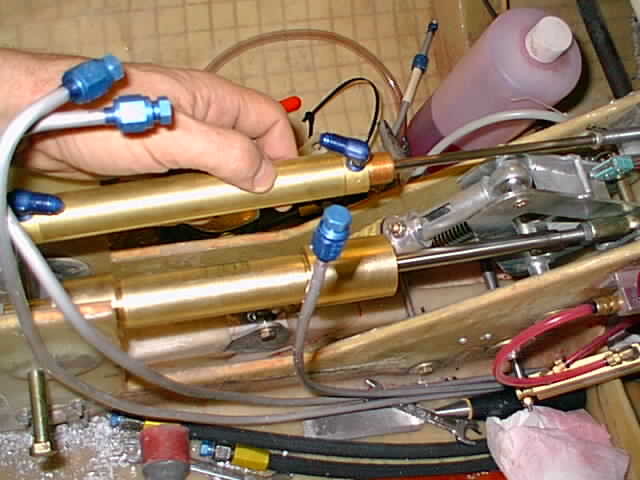
Shown below is the new cylinder installed with the Clippard unit in the
background. You can see the obvious difference in central shafts by comparison.
12/24/04 Post build note: If you check the Landing gear construction
section it notes that all three actuators were replaced with steel
Custom Actuators ones.
After adjusting the nose gear position the brass actuator stroke was a
bit too short and I replaced it with the steel one with the added benefit
of over a pound weight saving and more compactness.

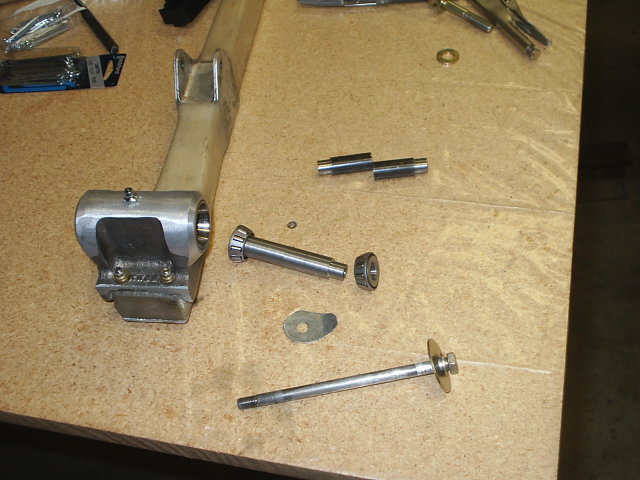
The KLS factory standard "Cozy MK-IV" pivot assembly has considerable wobble because of the bolt/bushing play. The play may get worse with time. I decided to risk the $255 and try the alternative. But there was some play between the bolt and bushing inside the new assembly and the bushing was a tad short for precision. So I machined my own bushing. An additional "tin washer" helps the precision fit. I also retrofitted grease nipples to both the NG and RG pivot assemblies - something I don't recall mentioned in SQ2000 instructions.